
Are you picking up a new Tesla Model Y? I just did, so I created a comprehensive list of what you need to look out for.
Pre-Delivery
Things you’ll need to do before delivery can be scheduled.
Tesla app
- Download the Tesla app and sign in with the email you used to place your order
- Complete all required paperwork below (direct vs non-direct sales states vary)
- Add a payment method to your account
- This will be used for software subscription billing (like FSD, if you sign up) or Tesla Supercharging fees automatically
Paperwork
For non-direct sales states, such as Texas and Wisconsin, prior to your delivery appointment, you’ll need to:
- Upload driver’s license and verification selfie
- Submit car registration paperwork
- Upload VIN-containing proof of insurance – set effective date 72+ hours pre-delivery
- Provide full funding to Tesla
- Your down payment (if any) will be separate from your bank’s loan process
- Sign the rights to register the vehicle over to Tesla so they can apply for your license plates
For direct sales states, such as California and Florida, you can complete most paperwork 24 hours or less before your delivery, and insurance coverage can start the day you pick up the vehicle. You also don’t have to pay for the car until you arrive.
Delivery Day (More Paperwork)
- Ensure the buyer names and addresses are correct on all paperwork
- Double-check that the correct VIN for your vehicle is shown
- Look at the Monroney sticker to make sure it reflects your build and options correctly
- Bring proof of a down payment if sent beforehand and a method of full payment if not already provided
- Have a copy of your insurance card (I recommend printing it), with the date reflecting at least the delivery day, if not before
- Don’t forget your driver’s license
Don’t accept delivery before reviewing the car inside and out!
Exterior Walkaround
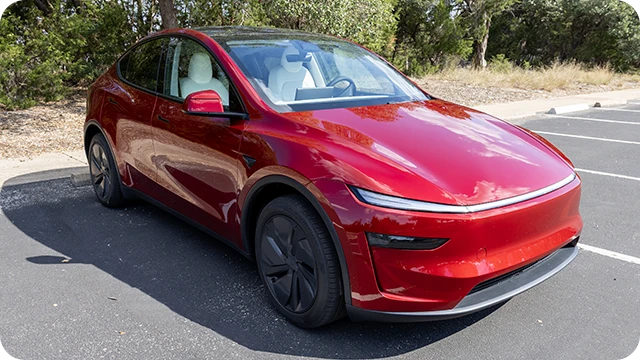
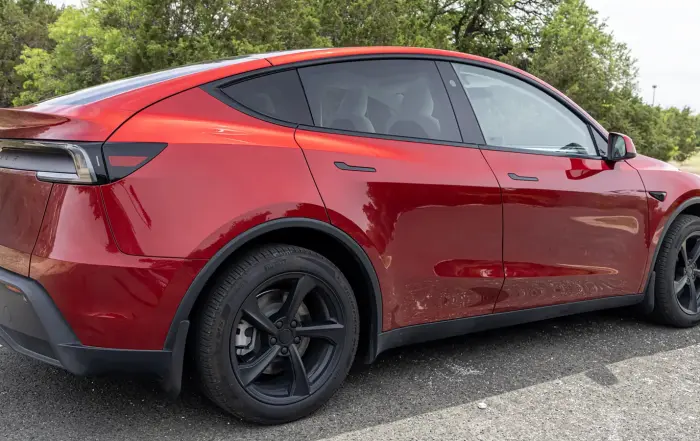
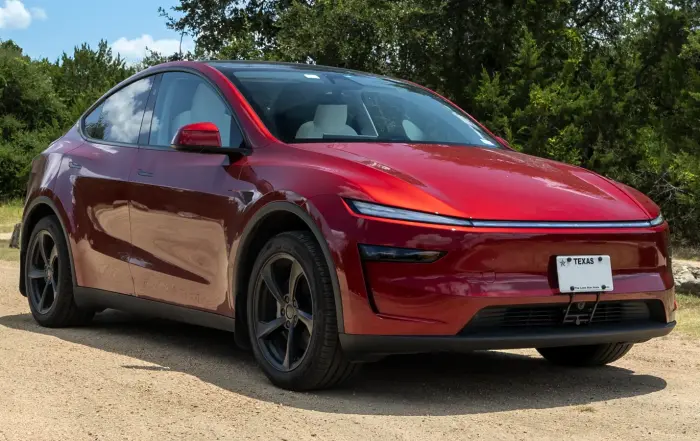
My 2026 Tesla Model Y Juniper.
- VIN
- Verify the VIN on the windshield matches paperwork
- Paint
- Carefully (!) look at the paint using your phone’s flashlight function (if indoors)
- Be sure that there aren’t any scratches, scuffs, or damage to the clear coat
- Panel gap flushness and symmetry
- Check all gaps – doors, hood, quarter panels, and rear hatch (common problem areas)
- Confirm door lines are flush (stand behind the car and look for protruding doors, very common)
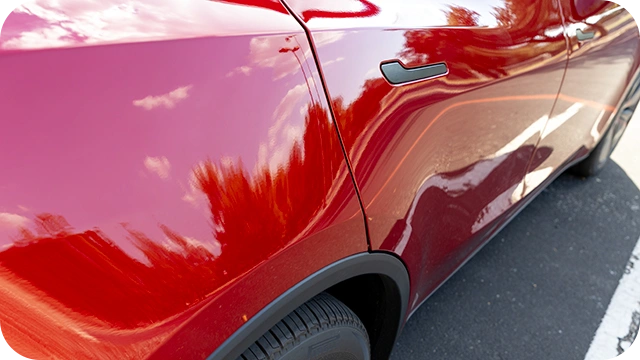
Tesla claims my rear passenger door is within spec, despite it clearly being malformed and misaligned. Therefore, if your car looks like this, you should reject it.
- Rear applique (with “Tesla” spelled on it)
- Press top and bottom edges, confirm it’s properly attached and doesn’t squeak (mine did!)
- Taillights
- Look at the gaps around both lights to see if spacing is equal
- There shouldn’t be condensation either
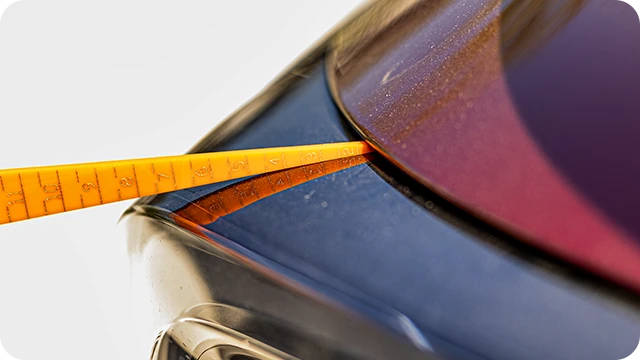
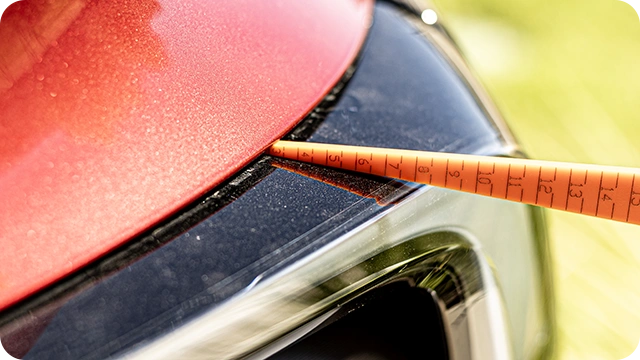
My Model Y’s right taillight gap is double that of the left (3mm vs 1.5mm).
- Front lights (lightbar, headlights, daytime running lights)
- Check for large gaps between the housings and body panels
- Look closely for condensation here as well
- Side view mirrors
- Squeeze the black plastic of both mirrors to check that they don’t squeak and feel firmly connected
- Look for cracks in the glass
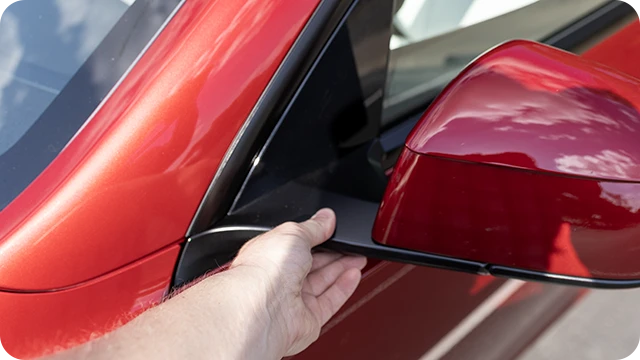
You don’t want squeaky plastic arms connecting to your side mirrors, so give them a quick squeeze to make sure they are put together properly.
- Black exterior door trim
- Try to wiggle the trim to see if it’s loose
- Also look for scratches, stains, or discoloration

The window trim should be scratch-free and well attached.
- Exterior cameras
- Gently wiggle the camera housings on the front quarter panels, the front camera (above the grille), and rear camera (near the hatch button) to see if they are loose
- Wheels and Tires
- Look out for stuck screws/nails/debris
- Check the rims and wheel covers (if you have them) for scratches, marks, or other damage
- Wheel wells
- Ensure that no liners are sagging, the plastic pins are fully pushed in
- Undercarriage (front and rear bumpers, sides)
- Check for any scrapes, scratches, or dents, as well as any components hanging down
- Charge port door
- Look for symmetrical gaps all around
- Door handles
- They should sit flush with the body and not be sunken
Exterior Functions After Unlocking the Car
Tesla should allow you to unlock the car before accepting delivery. I highly recommend reviewing the exterior functions and interior first.
- Test the lights
- Test the front lightbar, low/high beams, turn signal indicators (front and back), reverse, brake, and side repeaters (on the camera housing)
- Wipers and fluid
- Check that all speeds work
- Press and hold the steering wheel wiper button to release fluid
- Doors
- Should all open and close easily, with no rattles or other odd sounds
- Test both the interior and exterior door handles to make sure they work properly
- Look for any bubbles in the rubber seals
- Open each door and pull down on the grab handle to make sure each interior panel is firmly attached
- Look for any stains, rips in the fabric, scratches or dents on the speaker grille, etc.
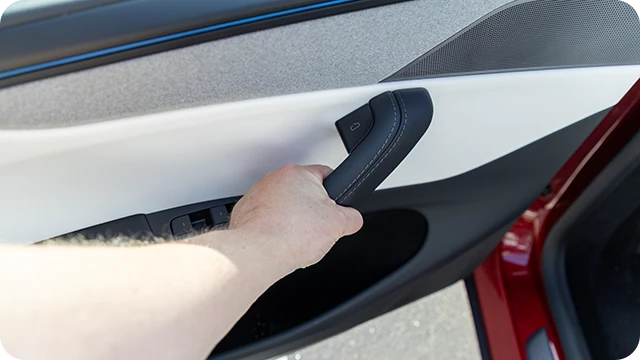
In the past, some owners’ interior door panels have been loose, so pull up or push down on the handle to double-check.
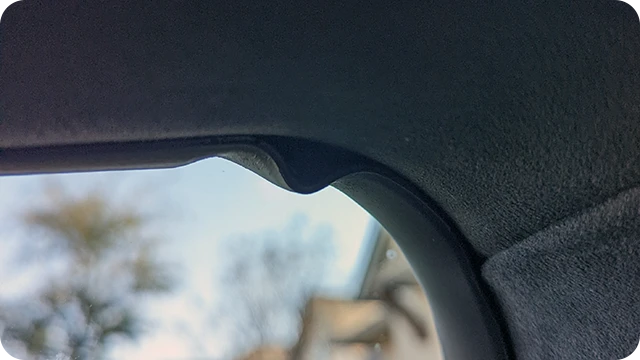
Look for bubbles in the door seals.
- Windows
- Roll all four windows down and then all the way back up with the doors both opened and closed
- One-touch up/down function – front windows only
- The windows should automatically partially lower themselves when the doors are open and roll back up when closed to protect the glass
- Distortions – Look out of each window from inside the car to check for any distortions (wavy funhouse effect)

If your window looks like this when the door closes, something is wrong.
- Windshield and hatch glass
- Check for any scratches or cracks from inside the car
- Distortions – From inside the car, look out through both to make sure there aren’t any
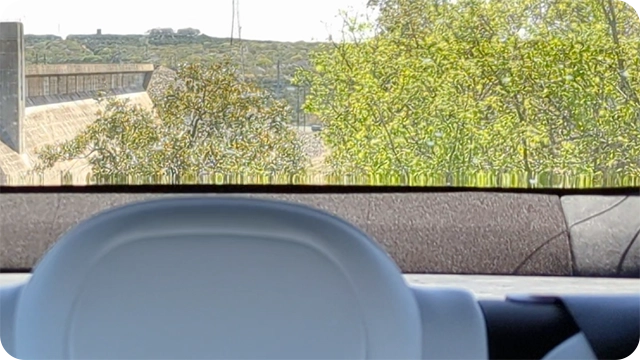
Distorted glass in my Tesla Model S (look at the bottom, the trees are “smudged”).
- Hatch/Trunk
- Test power open/close from external button (below the applique) and internal button
- The hatch should open and close smoothly with minimal noise
- If you hear a loud “pop” when it opens, it may be incorrectly aligned
- Look for paint rubbing on quarter-panel tops when the hatch is open
- Make sure the seals around the hatch and trunk are properly set and aren’t bubbly or misaligned
- Sometimes there’s an uneven gap between the rubber trunk seal on the left or right side
- The hatch connectors should be even; if one is touching the rubber seal (as shown below), they’re likely not placed properly
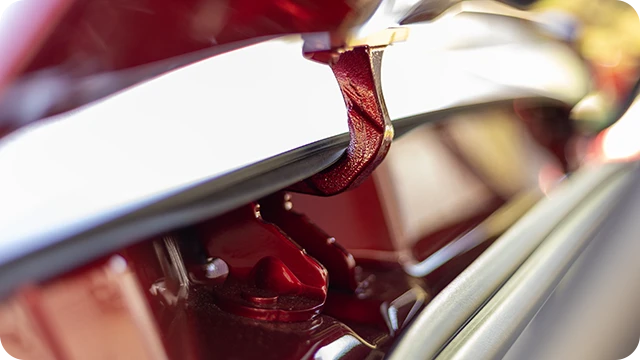
On the left side, my Model Y’s hatch connector pushes up against the rubber seal at the top. The right side doesn’t.
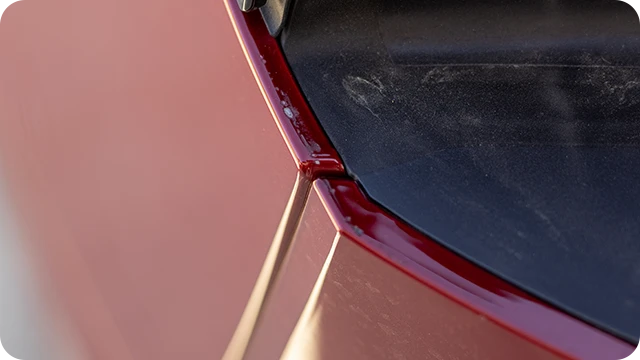
Because of my misaligned hatch, the paint was damaged on the quarter panel.
- Charge port
- Should open when you press on it (or press the button on the center screen) and close automatically after ~30 seconds
- Rear spoiler (if equipped)
- Pull on the spoiler and check that it’s firmly attached
- Look for any gaps with the body
- Inspect it carefully for any deformities, such as being vertically curved
Interior
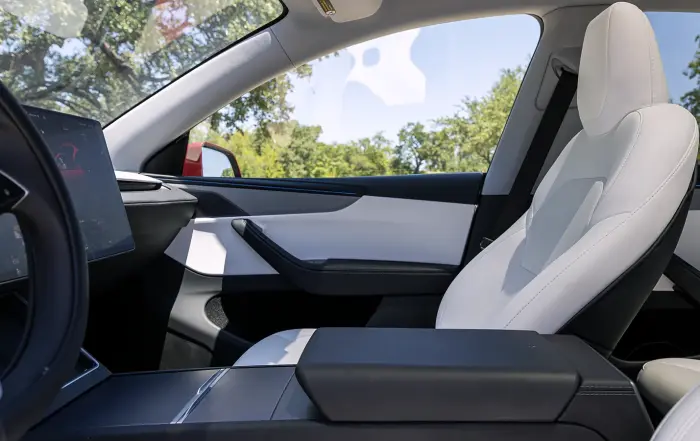
- Off-white body trim pieces (A-pillars, B-pillars, C-pillars, headliner)
- No marks, stains, or scratches
- Press against the various trim pieces to ensure they are firmly attached and don’t make any noise
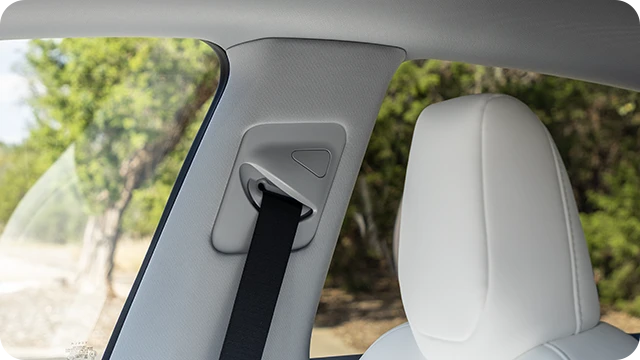
The pillar gaps should be small like this, with very little space between trim pieces.
- Seats
- (Front and back) Look for significant wrinkles, scratches
- (Front and back) Fully extend and latch seatbelts for all seats
- (Front) Test seat controls by moving both driver and front passenger seats to their full forward, backward, and vertical positions
- (Back) Middle rear seat should sit flush on both sides
- (Back) Armrest should fold down and sit flat without noise
- (Back) Press the folding function buttons on both sides to ensure seats automatically come down and retract fully
- (Back) Pull up on the bottom seat cushions, ensuring they are secured
- (Back) Pull on both seatback pockets to check if they are connected properly
- (Back) Open the hatch and use the seat functions to ensure they work properly there as well
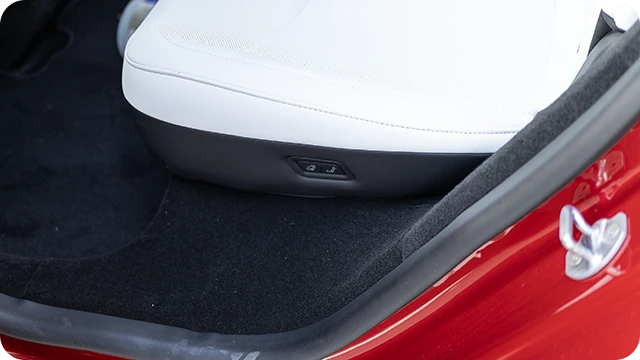
Don’t forget to test the rear seat folding operation using the buttons on both sides and in the cargo area.
- Center console
- Both pieces should fully open and close without squeaking noises
- Light (frontmost cubby) – check that the light turns off in the front large center console compartment by recording a video with your phone while it is fully closed
- Press against both sides of the center console to make sure it doesn’t squeak and isn’t loose
- Wireless charging pads
- Place your phone on the wireless charging pads (under the screen) and ensure that both work properly
- You may have to remove thick cases
- Floor mats
- Ensure that carpeted floor mats have been included front and back
- Front visors
- Fold both front sun visors down and inspect the condition of the glass and lights
- Move visors around and listen for undesirable sounds
- Rear coat hooks, cabin lights
- (Hooks) Press in on the coat hooks and check for smooth operation and that they close properly
- (Lights) Press them to turn on/off
- Glovebox
- On the center screen, press the car icon, go to “controls” and then press “glovebox” to open the compartment
- Look for full extension, noise-free operation, a working light, and a Tesla-provided SSD for features like Sentry Mode
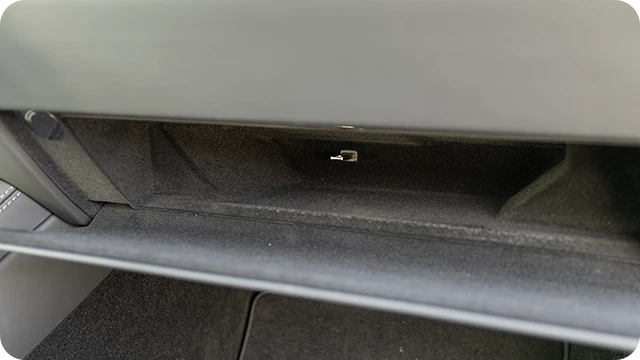
Look in the glovebox for this small included Tesla SSD.
- Steering wheel
- Look for tears/scratches
- Press horn (middle section)
- Rearview mirror
- Move it around, should be secure, noise-free
- Look for rear hatch glass distortion from this view as well
- Turn signal stalk
- Press down to test that it activates the left blinker and press up for the right blinker
- A B-pillar camera feed should display on the center screen as you do so
Screen Controls & Software Functionality
- Center Screen
- Inspect that there are no scratches, scuffs, or discolorations on the screen
- Put your flat palms on both sides of the screen and check that it’s secured
- Go to the Toybox menu, select “Sketchpad” and let it sit for 1-2 minutes while watching for phantom touches and dead pixels
- Look for any error messages (yellow caution box on the lower left side of the screen)
- Confirm that the car is not in transport mode
- Tap through various menus, they should be fluid/responsive
- HVAC system
- Tap the climate controls on the bottom left of the screen (where temperature is shown)
- A/C – turn the fan all the way to high, make sure it blows cold air
- Heater – turn the fan all the way to high, make sure it blows hot air
- Switch between various functions (recirculation, Biohazard Defense Mode, etc.)
- Move the blower direction around
- Heated and ventilated seats
- (Heated) Under the climate controls menu, press the seat icons three times to turn on heated seats
- (Ventilated) Press and select the pop-up menu to change from heated seats to ventilated, and repeat the process
- Steering wheel
- Test movement (Car icon > Controls > Steering), extend all the way out, up, down, and in, it shouldn’t creak
- Heated function – Turn on from the climate controls menu
- Side mirrors
- Test movement (Car icon > Controls > Mirrors) and select one side and use the left steering wheel button to move around, repeat with other side
- Fold/Unfold function (Controls > Fold Mirrors)

You can adjust many functions, including mirror and steering wheel positions in the “Controls” menu.
- Cameras
- Press the camera icon in the menu and look for clear feeds for the front, back, and side repeater cameras
- Drive functions
- Drive – Put your foot on the brake and slide your finger forward on the left side of the screen to put the vehicle in drive
- Reverse – Foot on brake, slide finger down for reverse
- Neutral – Go to Car icon > Controls > Neutral (hold to activate with your foot on the brake)
- Park – foot on brake, press in the middle of the slider for park
- Repeat the test using the physical controls in the headliner (press and hold each one with your foot on the brake to activate them)

The primary way to control the drive functions in all new Teslas is with the screen.
- Navigation
- In the search box on the navigation screen (map), input a destination, which should calculate trip details like ending range estimate automatically
- Sound System
- Play a song (local radio) or use one of the apps like Spotify if available
- On the bottom left of the screen press the three-bar icon, which will open the sound system controls
- Test raising the various levels for sub, bass, treble, and ensure there’s no noticeable crackling in the sound, or rattles created by the speakers
- Click the “balance” tab and move the white icon around by pressing and dragging it; this will allow you to check speakers in each section of the car
- VIN check (again)
- Select the car menu icon, go to “Software” and ensure that the correct VIN is listed on the screen
- Ambient lighting
- Car icon > Lights > Accent Lights
- Here, you can test changing colors, brightness, etc.
Included Items & Accessories
- Key cards
- You should be given 2 key cards in a cardboard sleeve that both lock/unlock the car and allow you to drive it
- You can test the lock and unlock functionality by holding the cards about 2 inches below the driver’s side B-pillar camera
- Check for drive functionality by placing the cards horizontally directly in front of the armrest
- SAE J1772 charging adapter
- Should be provided (usually in the rear sub trunk)
- Front license plate holder
- For markets where required, Tesla should give you a black plastic license plate holder for the front of the vehicle
- Tesla mobile charging kit
- Currently provided with all new Tesla Model Ys and should be located in the rear sub trunk as well
- Tow hitch (if equipped)
- Remove the panel and make sure your tow hitch has been installed and isn’t loose

You should get two key cards with your Model Y.
Accepting Delivery & Further Checks
At this point, you’ve spent a good 30 minutes or more checking some of the more critical items. If things look good to you, open the Tesla mobile app and swipe over until you see a button that says “accept delivery.” The vehicle is now yours, congratulations!
Submit a Service Request (Important!)
Tesla’s current policy is that a customer needs to report build and quality issues within 24 hours, but take it from me: be safe instead of sorry.
If you did find any issues, I highly recommend submitting an initial service request of all the items with descriptions and pictures before you leave the delivery center. That way, Tesla can’t claim that things like paint scratches or other damage were caused by you on the way home.
- You can submit a request by opening the Tesla mobile app and selecting the menu item “request service”
- I’d also recommend noting each item with “found on delivery” or similar
- Take your time and be descriptive! It will take Tesla some time (usually 1-3 business days) to respond to your request and get you scheduled
Rejecting Delivery
- If you find there are more issues than you are willing to deal with, tell the delivery team that you want to reject delivery before you select the “accept delivery” button if possible
- Policy on getting you a new VIN and/or canceling your order has changed quite a bit over the years, but as of writing, Tesla should allow you to reject one vehicle and place you back in line for another
- I’d recommend talking to the team about your options
- No matter what though, don’t let them pressure you into taking a vehicle you won’t be happy with. They can’t (or won’t) always fix bigger problems like door misalignments, even if the delivery team tells you that they can
Post-Delivery Checks
At this point, you’ll be driving the vehicle home, but you aren’t quite done yet. You’ll have some post-delivery things to check out.
Driving Away
- Rattles/squeaks/other weird noises
- I’d recommend keeping the windows rolled up, with no A/C or music playing and listen for various undesirable noises; wind noise should also be minimal
- Alignment
- The Model Y should drive straight, without any shaking of the steering wheel, which should be centered at the same time
- Brakes
- When it is safe to do so, press your brakes a bit hard and look for any weird behavior or sounds
- Suspension
- The Model Y’s suspension can make some noises like light “clunks” when going over bumps, but it shouldn’t squeak
Connectivity & Ports
- Phone Bluetooth pairing
- Your phone should pair as a key
- To do this, you can go to the Car icon > Bluetooth
- Premium Connectivity status
- Currently, each Model Y comes with 30 days of Premium Connectivity
- This enables services like real-time traffic and the theater options (e.g., Netflix)
- You can check if this is working by attempting to open a media app, which should allow you to log in and watch while you’re parked, assuming you have an internet connection
- Mobile hotspot
- With a Premium Connectivity subscription, your Model Y will have access to a mobile hotspot, which allows you to play media while on the go
- Simply play some media on one of the car’s built-in apps or open the internet browser and navigate to your favorite website to make sure it’s working
- Wi-Fi
- Once you are home, on the screen, select the Car icon > Wi-Fi, to connect
- USB-C ports
- In the Juniper Model Y, there’s one in the cubby under the center armrest and 2 below the rear screen
- Plug your phone into each one and ensure it charges

- 12V outlet
- This is located in the front cubby of the center console. If you have a compatible device or converter, I’d recommend testing it as well
Charging
This step is absolutely necessary, and it’s best to do it ASAP.
- DC fast charging (Tesla Superchargers are ideal)
- If possible, on your way home, stop and charge at a Tesla Supercharger location
- Speeds may vary by charger type and current battery level, but I’d at least let it charge for 10-15 minutes before unplugging if you can
- Check charging stats on the app and Model Y screen
- Home charging
- Use the included Tesla mobile charging kit to plug into a regular wall outlet at home
- If you have one, you can test out the Level 2 (240V outlet) adapter as well, but it’s probably not necessary
- Let the car charge overnight or for several hours
- Charge port
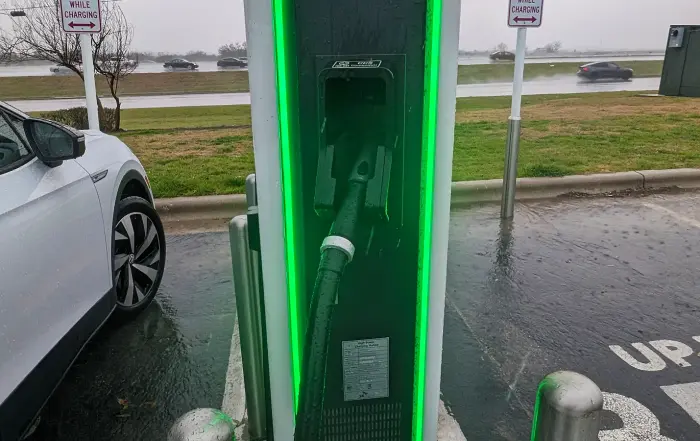
- Should blink green when charging
- If you see a dark blue light when plugged in, the car doesn’t recognize that anything has been inserted into the port
- If you see light blue, it’s connecting to the equipment
- If you see red, something is wrong; unplug and try again
Checking Lights Again at Night
- Exterior
- Retest headlights, taillights, red rear lightbar, etc.
- Interior
- Footwell lights (if enabled in the “Lights” menu)
- Test ambient lighting color and brightness changes
- Ensure all dome lights (front headliner and sides) activate when enabled in the menu
- Trunk area lights should both come on when the hatch is open
- Adaptive headlights
- Car icon > Lights > Adaptive Headlights
- When high beams are active, confirm sections turn off when detecting a vehicle or person (lights on)
Update Your Service Ticket If Needed
If you find any other problems on the way home, be sure to update the service ticket as soon as possible and keep in mind the 24-hour/100-mile rule for reporting wear and tear issues.
Last Step: Enjoy!
I realize this is a long list, but with Tesla’s build quality being hit-or-miss, you’ll be so much happier checking each item on pickup day (or before you accept delivery) than finding out you’ve missed a bunch of problems Tesla refuses to fix because you reported them too late (been there, done that).
More than likely, you’ll only have minor concerns to contend with and they’ll be addressed within a few weeks after delivery. Otherwise, just enjoy your new Model Y, which is a wonderful vehicle to own!
Sources
Related Articles